
Schematic Designs with Instantiated HDL-Based Macros
This section explains how to create HDL macros and then add them to a schematic design.
Creating HDL Macros
After you create an HDL macro, the macro is available from the SC Symbols window in the Schematic Editor. Following are the steps to create HDL macros.
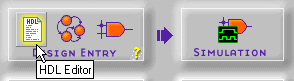
- Open the HDL Editor by clicking the HDL Editor icon in the Design Entry box on the Project Manager's Flow tab.
- When the HDL Editor appears, you may select an existing HDL file or create a new one. The following steps describe creating a new HDL file with the Design Wizard.
- In the HDL Editor dialog box, select Use HDL Design Wizard. Click OK.
- From the Design Wizard window, select Next and then choose VHDL, Verilog, or ABEL and select Next. (You must have Base Express or Foundation Express to select VHDL or Verilog.)
- Enter a name for your macro in the Design Wizard - Name window and then select Next.
- Define your ports in the Design Wizard-Ports window.
- Click Finish. The Wizard creates the ports and gives you a template in which you can enter your macro design.
- Complete the design for your macro in the HDL Editor.
- Create a macro symbol by selecting Project
 Create Macro from the HDL Editor window.
The synthesizer will not insert top level input and output pads for this macro. Instead the top level schematic, which contains the macro, includes all top level input and output pads required for implementation.
For more information about creating HDL macros, from the Project Manager window, select Help Foundation Help Contents HDL Editor.
Creating the Schematic and Generating a Netlist
- Open Schematic Capture by clicking the Schematic Capture icon in the Design Entry box on the Project Manager's Flow tab.
- Select Mode Symbols to add components to your new schematic.
Any macros that you have created display in the SC Symbols toolbox under the project working library's heading.
- Select the HDL macro that you created by clicking its name.
- Move your cursor to the schematic sheet and place the macro symbol by clicking.
- Complete your schematic by placing additional components from the Symbol toolbox including I/O ports, nets, buses, labels, and attributes.
- Save your schematic by selecting File Save.
For more information about schematic designs, see the “Schematic Design Entry” chapter or, in the Schematic Capture window, select Help Schematic Editor Help Contents.
To complete the design, read the following sections in the order listed:
